
Installing Caffe and ApolloCaffe on Ubuntu 16.04
 My team is looking at providing a new and refreshed NUS Bus App, that provides not only location tracking, but also crowdedness estimation. To achieve the second aim, we found a cool package called Reinspect which counts the number of people in an image. So while the others are working on the hardware (Ten), the web server (Patrick) and the UI (Zhuohan), I’m figuring out how to make a function that takes in images and spits out people counts. But before I could even dive into Reinspect, the dependencies alone took me an incredible amount of time to set up. So for the blog post this week, I’ll be documenting how I set up CPU-only Caffe and ApolloCaffe on a Ubuntu 16.04 Digital Ocean Droplet.
(Some of the) Stuff I referenced
There was plenty of existing documentation on installing Caffe on Ubuntu, but some of the stuff just didn’t work for me, and I had to google around for fixes to all the problems I was facing.
- https://www.digitalocean.com/community/tutorials/initial-server-setup-with-ubuntu-16-04
- http://caffe.berkeleyvision.org/install_apt.html
- https://github.com/BVLC/caffe/wiki/Ubuntu-16.04-or-15.10-Installation-Guide
- https://yangcha.github.io/GTX-1080/
- https://gist.github.com/BloodAxe/6441766
- http://apollocaffe.com/#Installation
Creating A New Droplet on DigitalOcean (Optional)
 If you don’t have an account yet, sign up using my affiliate link plzzzz. You get $10 free! Oh but if you’re a student, go get your free $50 worth of DigitalOcean credits using Github’s Student Developer Pack.
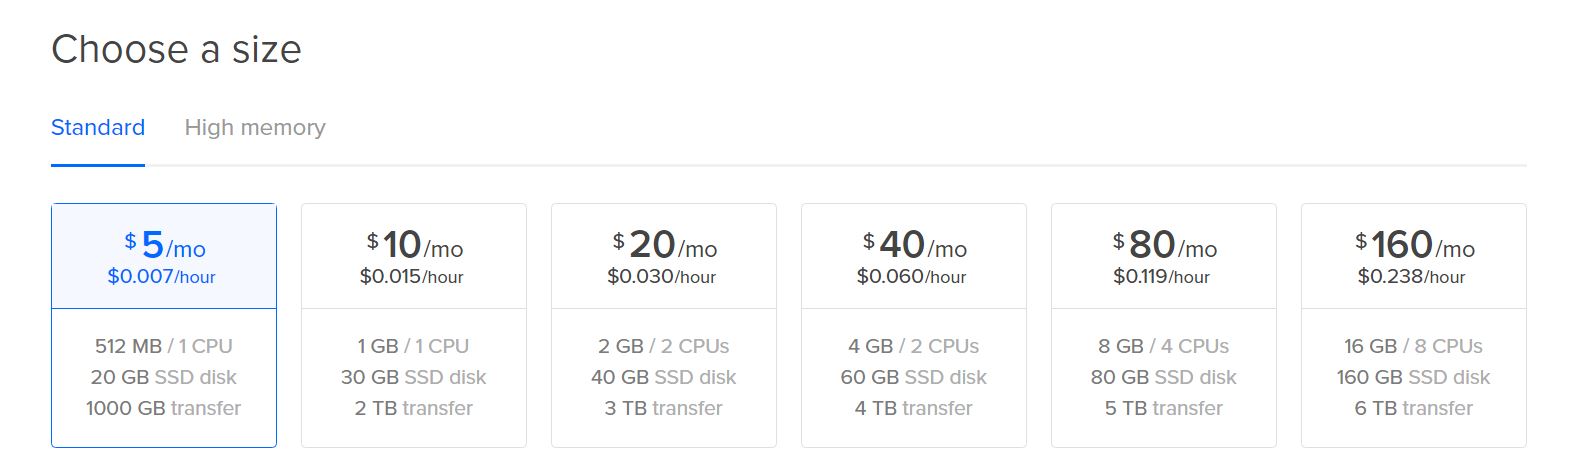
Anyways, I’m a poor student trying to conserve credits, so I went ahead to get the cheapest droplet (IMPT: you can still choose to upgrade your droplet to get more RAM and CPU cores, but you can’t downsize it later if you choose a big droplet here).
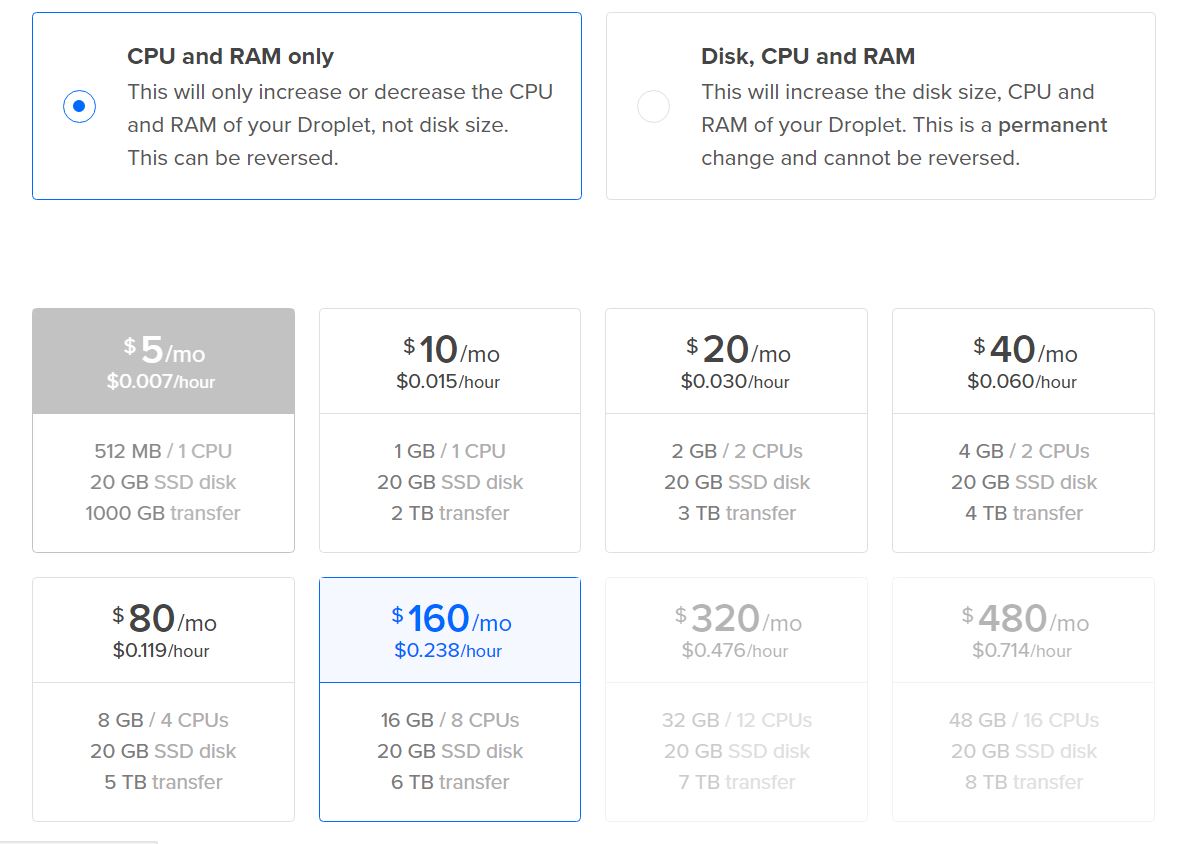 After getting whatever size droplet you have, be sure to resize it at least temporarily to the biggest size you can get your hands on. This ensures that you have sufficient memory to compile and install Caffe and ApolloCaffe. I was hitting into plenty of compile errors until I realised that the gcc compiler was out of memory. You can also use a swap file, but apparently that’s not recommended for the SSDs that DO uses for your droplets.
Installing Caffe Dependencies
Now it’s time to SSH into your server and install all your dependencies.
sudo apt install -y libprotobuf-dev libleveldb-dev libsnappy-dev libopencv-dev libhdf5-serial-dev protobuf-compiler libgflags-dev libgoogle-glog-dev liblmdb-dev python-pip python-dev python-numpy python-scipy libopencv-dev libboost-all-dev
Compiling Caffe
Download the files from github
mkdir caffe && cd caffe
wget "https://codeload.github.com/BVLC/caffe/tar.gz/master"
tar -xvzf master
rm master
Compile
cd caffe/caffe-master/
cp Makefile.config.example Makefile.config
You’ll need to make the following changes to your Makefile here
# Uncomment the CPU_ONLY line if you're installing the CPU only version
CPU_ONLY := 1
and here (These edits are related to the changes in the hdf5 install directory locations.)
# I had problems with hdf5 cos apparently hdf5 changed their install directory locations
# So make sure you note the following changes to the include_dirs and library_dirs
WITH_PYTHON_LAYER := 1

INCLUDE_DIRS := $(PYTHON_INCLUDE) /usr/local/include /usr/include/hdf5/serial

LIBRARY_DIRS := $(PYTHON_LIB) /usr/local/lib /usr/lib /usr/lib/x86_64-linux-gnu /usr/lib/x86_64-linux-gnu/hdf5/serial
I think you’re making some symlinks here?
find . -type f -exec sed -i -e 's^"hdf5.h"^"hdf5/serial/hdf5.h"^g' -e 's^"hdf5_hl.h"^"hdf5/serial/hdf5_hl.h"^g' '{}' \;

cd /usr/lib/x86_64-linux-gnu

sudo ln -s libhdf5_serial.so.10.1.0 libhdf5.so

sudo ln -s libhdf5_serial_hl.so.10.0.2 libhdf5_hl.so
Install the related python libraries from the python directory (found in the caffe-master directory you unzipped).
cd ~/caffe/caffe-master/python
pip install -r requirements.txt
And now it’s time to run make. The -j8 flag is to use all 8 available cores. Change the number if you’re not using that many, or just remove it altogether if you only have one core.
sudo make all -j8
sudo make test -j8
sudo make runtest -j8
sudo make distribute -j8
If you’re only installing Caffe, run the following to add it to the python path. Do not run this if you’re installing ApolloCaffe as well.
export PYTHONPATH=~/caffe/caffe-master/python:$PYTHONPATH
Installing ApolloCaffe
Now let’s install ApolloCaffe.
git clone http://github.com/Russell91/apollocaffe.git && cd apollocaffe
pip install -r requirements.txt

export LD_LIBRARY_PATH=$LD_LIBRARY_PATH:~/apollocaffe/build/lib # contains libcaffe.so
export PYTHONPATH=$PYTHONPATH:~/apollocaffe/python

cp ../caffe/caffe-master/Makefile.config Makefile.config
sudo make -j8
sudo make test -j8 && make runtest
At this point, test your install in Python. Try importing caffe, apollocaffe and cv2.
python

> import caffe
> import apollocaffe
> import cv2
If you can do all these without running into any import errors, you’re done.
Install OpenCV
At this point, I had an error with the cv2 import, and I fixed this by reinstalling OpenCV (Referenced this gist).
Download OpenCV files
sudo apt-get install cmake
curl -sL https://github.com/Itseez/opencv/archive/master.zip > opencv.zip
unzip opencv.zip
rm opencv.zip
Configure & install OpenCV
mkdir opencv-build
cd opencv-build/
cmake -DCMAKE_BUILD_TYPE=RELEASE -DBUILD_DOCS=OFF -DBUILD_EXAMPLES=OFF -DBUILD_SHARED_LIBS=OFF -DBUILD_TESTS=OFF -DBUILD_PERF_TESTS=OFF -DWITH_OPENEXR=OFF ../opencv-master/
sudo make install -j8
Now test your cv2 import again. I can’t help you if it still doesnt work :)
And you should be done!
Reinspect
If you’re interested in Reinspect…
git clone http://github.com/russell91/reinspect
cd reinspect
pip install jupyter
pip install munkres
make eval